Tạo File Share
Tạo File Share
-
Sau khi đã kết nối vào FSx/W Workshop Windows Instance
- Tìm và chọn fsmgmt.msc
-
Trong Shared Folders
- Chọn Action
- Chọn Connect to another computer….
-
Đối với Select Computer
- Thực hiện chọn Another computer
- Dán DNS Name vào và chọn OK
-
Thực hiện tạo file share
- Chọn chuột phải Shares folder
- Chọn New Share
- Chọn Next
-
Chọn Browse….
- Chọn d$.
-
Chọn Make New Folder.
- Đặt tên application cho folder mới.
- Chọn OK

-
Hoàn thành thông tin sau:
- Folder path: D:\application
- Share name: application
- Create new path: Yes
- Shared folder permissions: Customize permissions » Everyone Full Control

-
Chọn Finish
- Bạn có thể tạo thêm vài file share tương tự các bước trên.
Quản lý file share
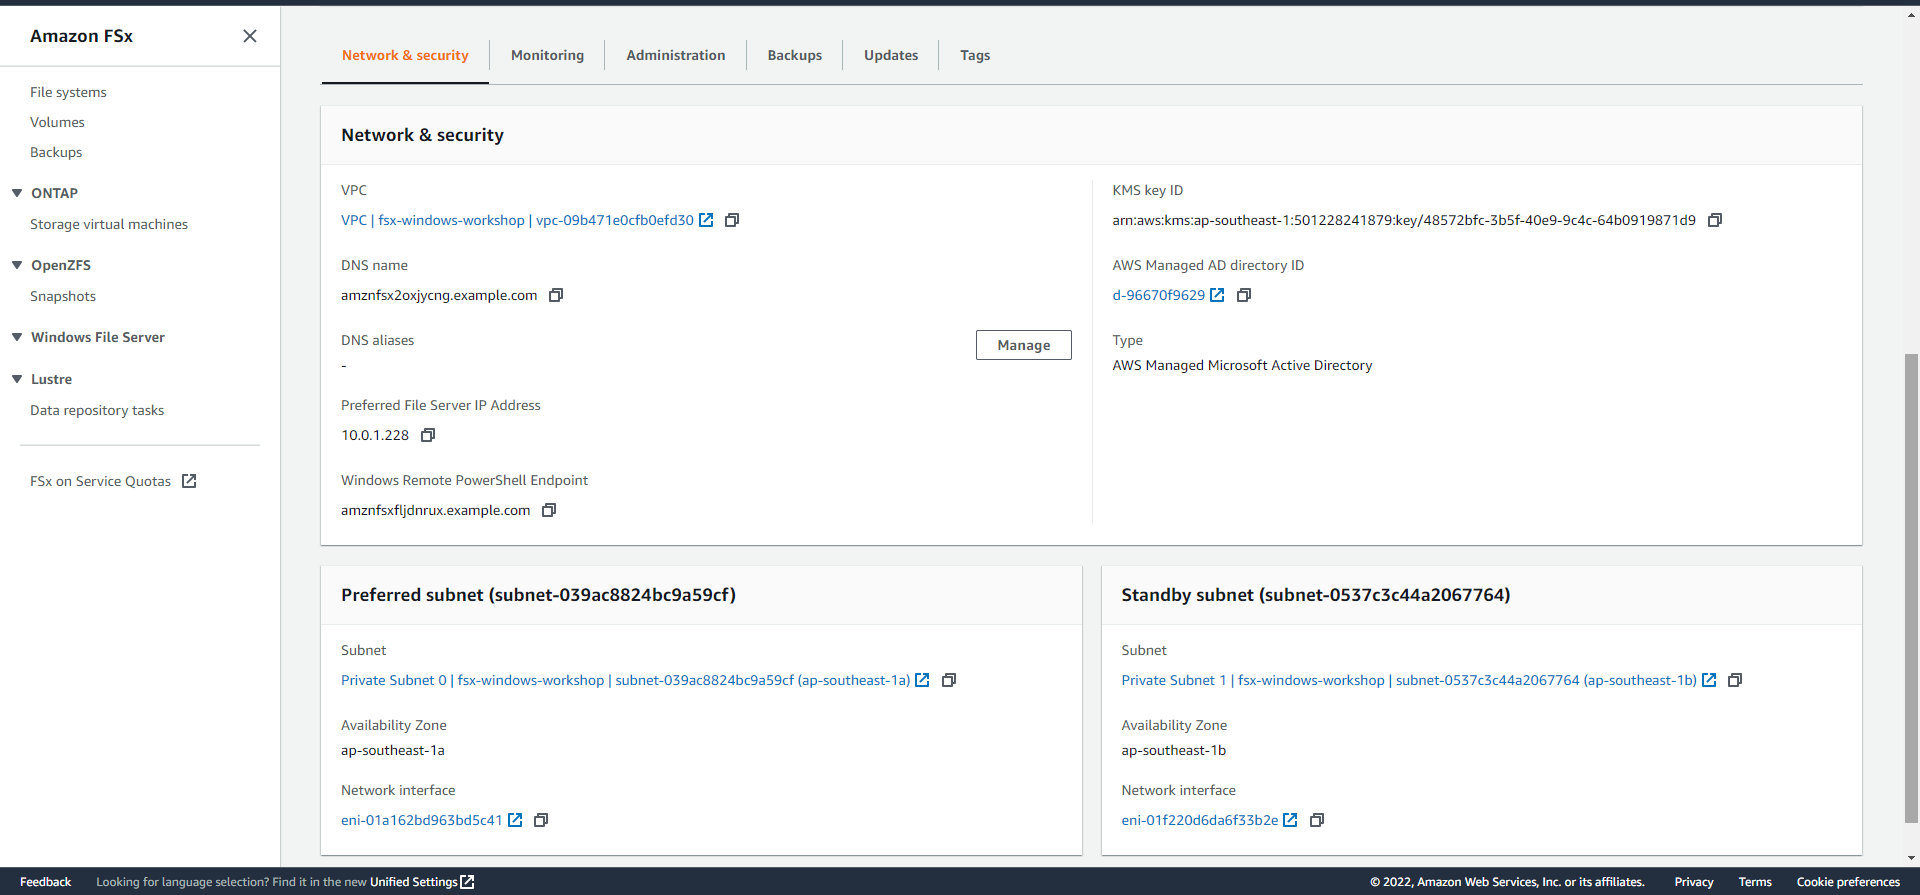
- Quay lại Amazon FSx sao chép Windows Remote PowerShell Endpoint
-
Mở Windows PowerShell
- Thực hiện các lệnh sau:
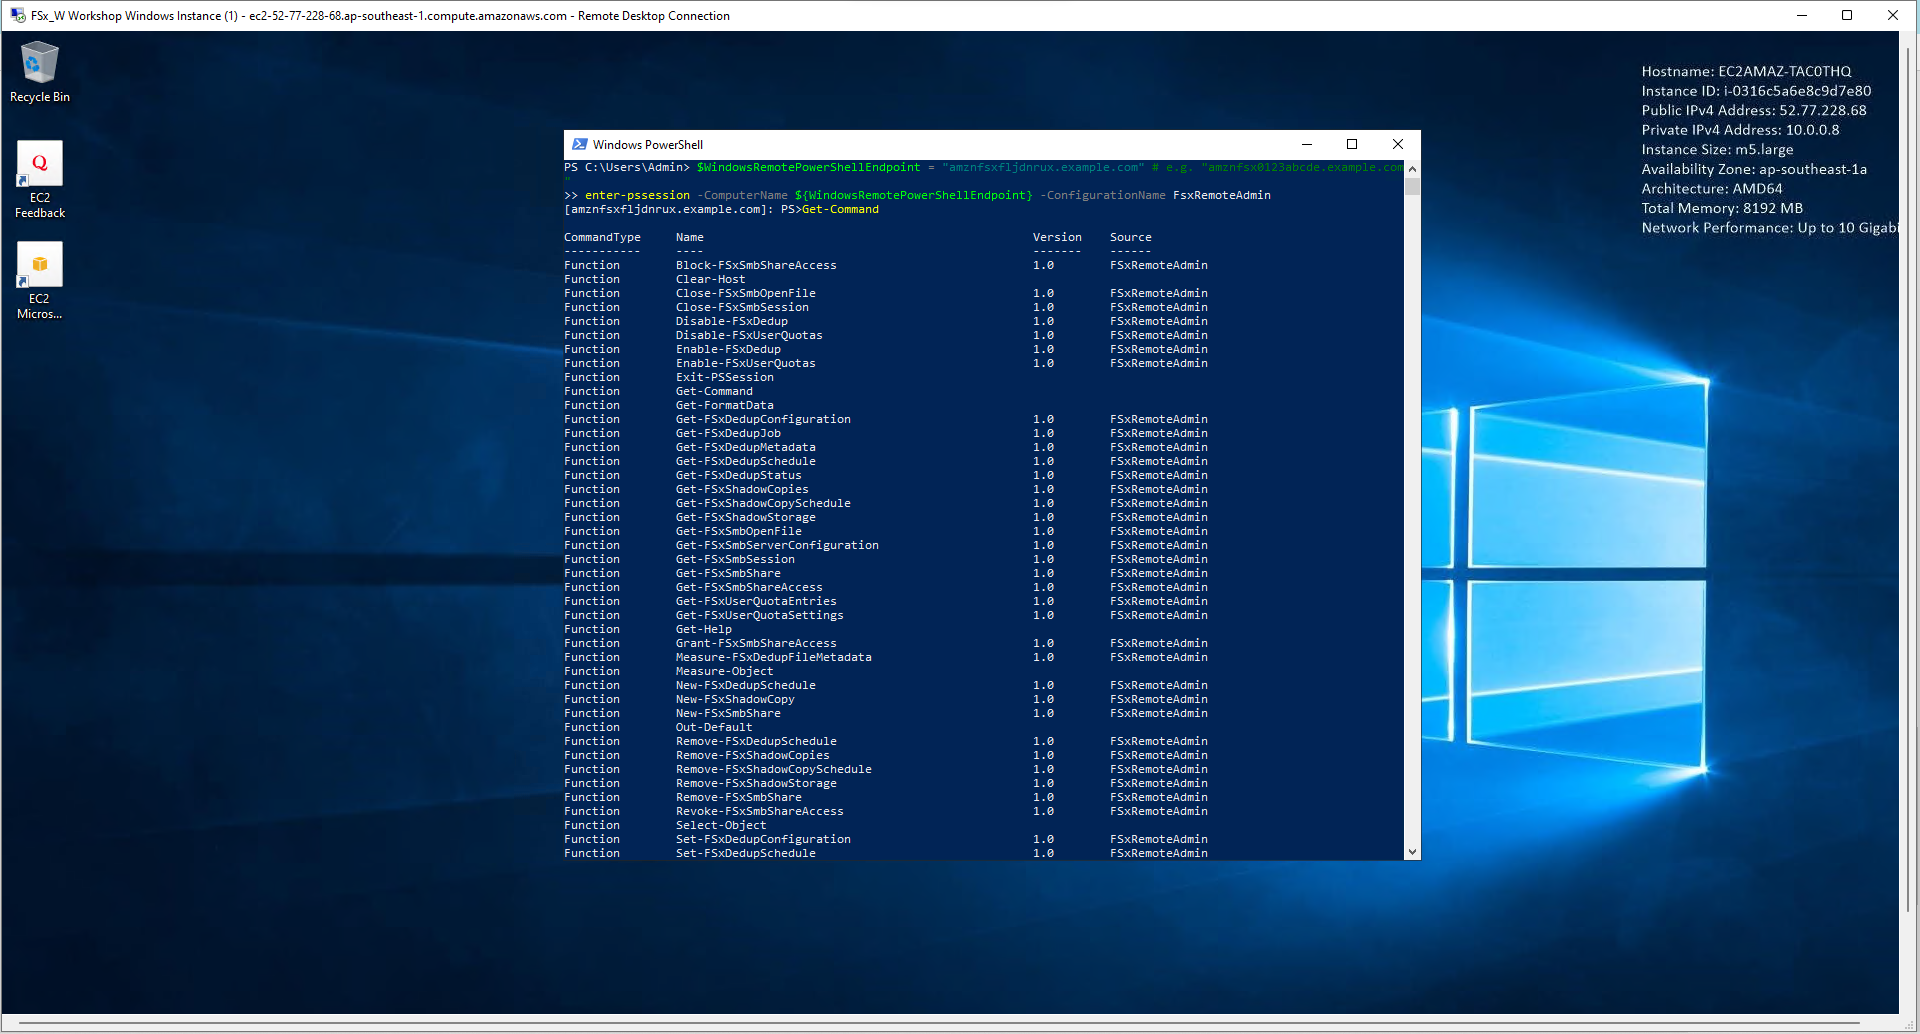
$WindowsRemotePowerShellEndpoint = "windows_remote_powershell_endpoint" # e.g. "amznfsx0123abcde.example.com"
enter-pssession -ComputerName ${WindowsRemotePowerShellEndpoint} -ConfigurationName FsxRemoteAdmin
- Nhớ thay thế bằng Windows Remote PowerShell Endpoint của bạn.

- Chúng ta sẽ thực hiện lệnh trong giao diện Remote Windows PowerShell Session

- Thực hiện lệnh sau:
Get-Command
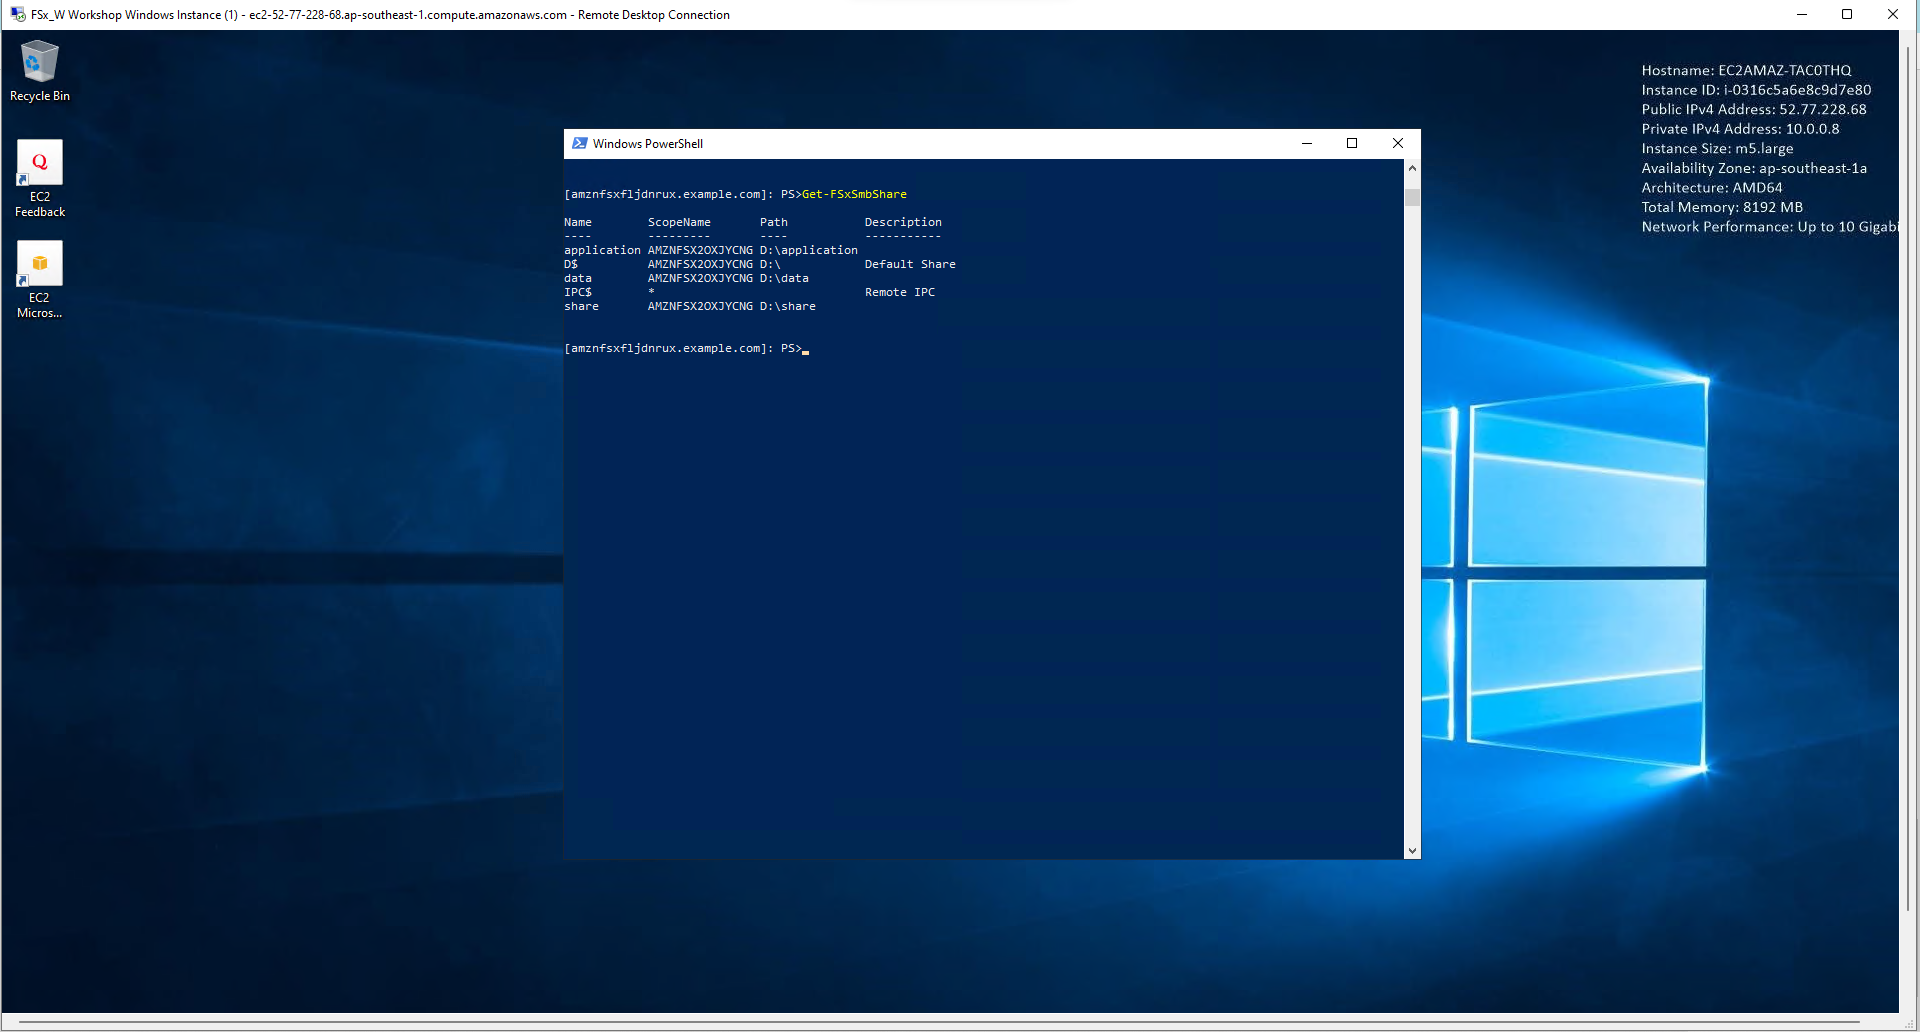
- Tiếp tuc5 thực hiện lệnh:
Get-FSxSmbShare
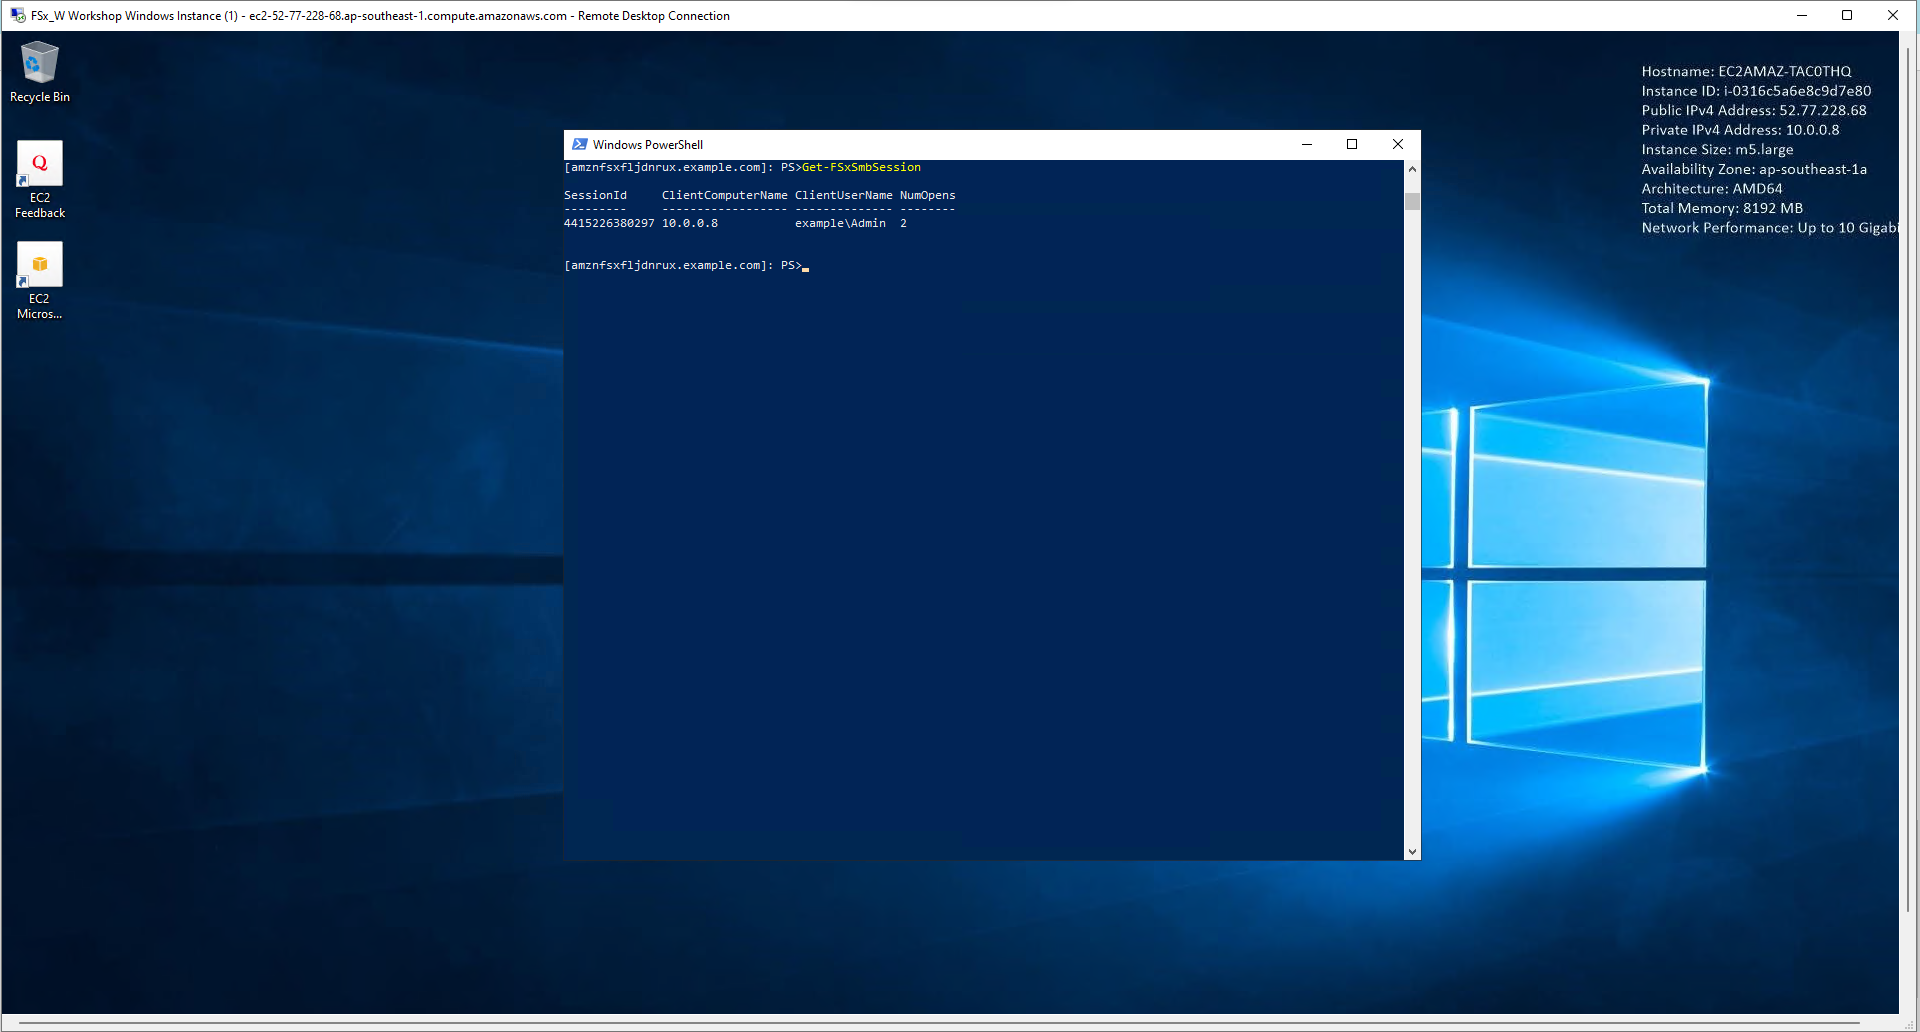
- Thực hiện lệnh:
Get-FSxSmbSession