Scale throughput capacity
Scale throughput capacity
This section will demonstrate how to scale the throughput capacity of the file system.
Note
It will take approximately 15 minutes to complete this section.
Important
Read through all steps below and watch the quick video before continuing.

-
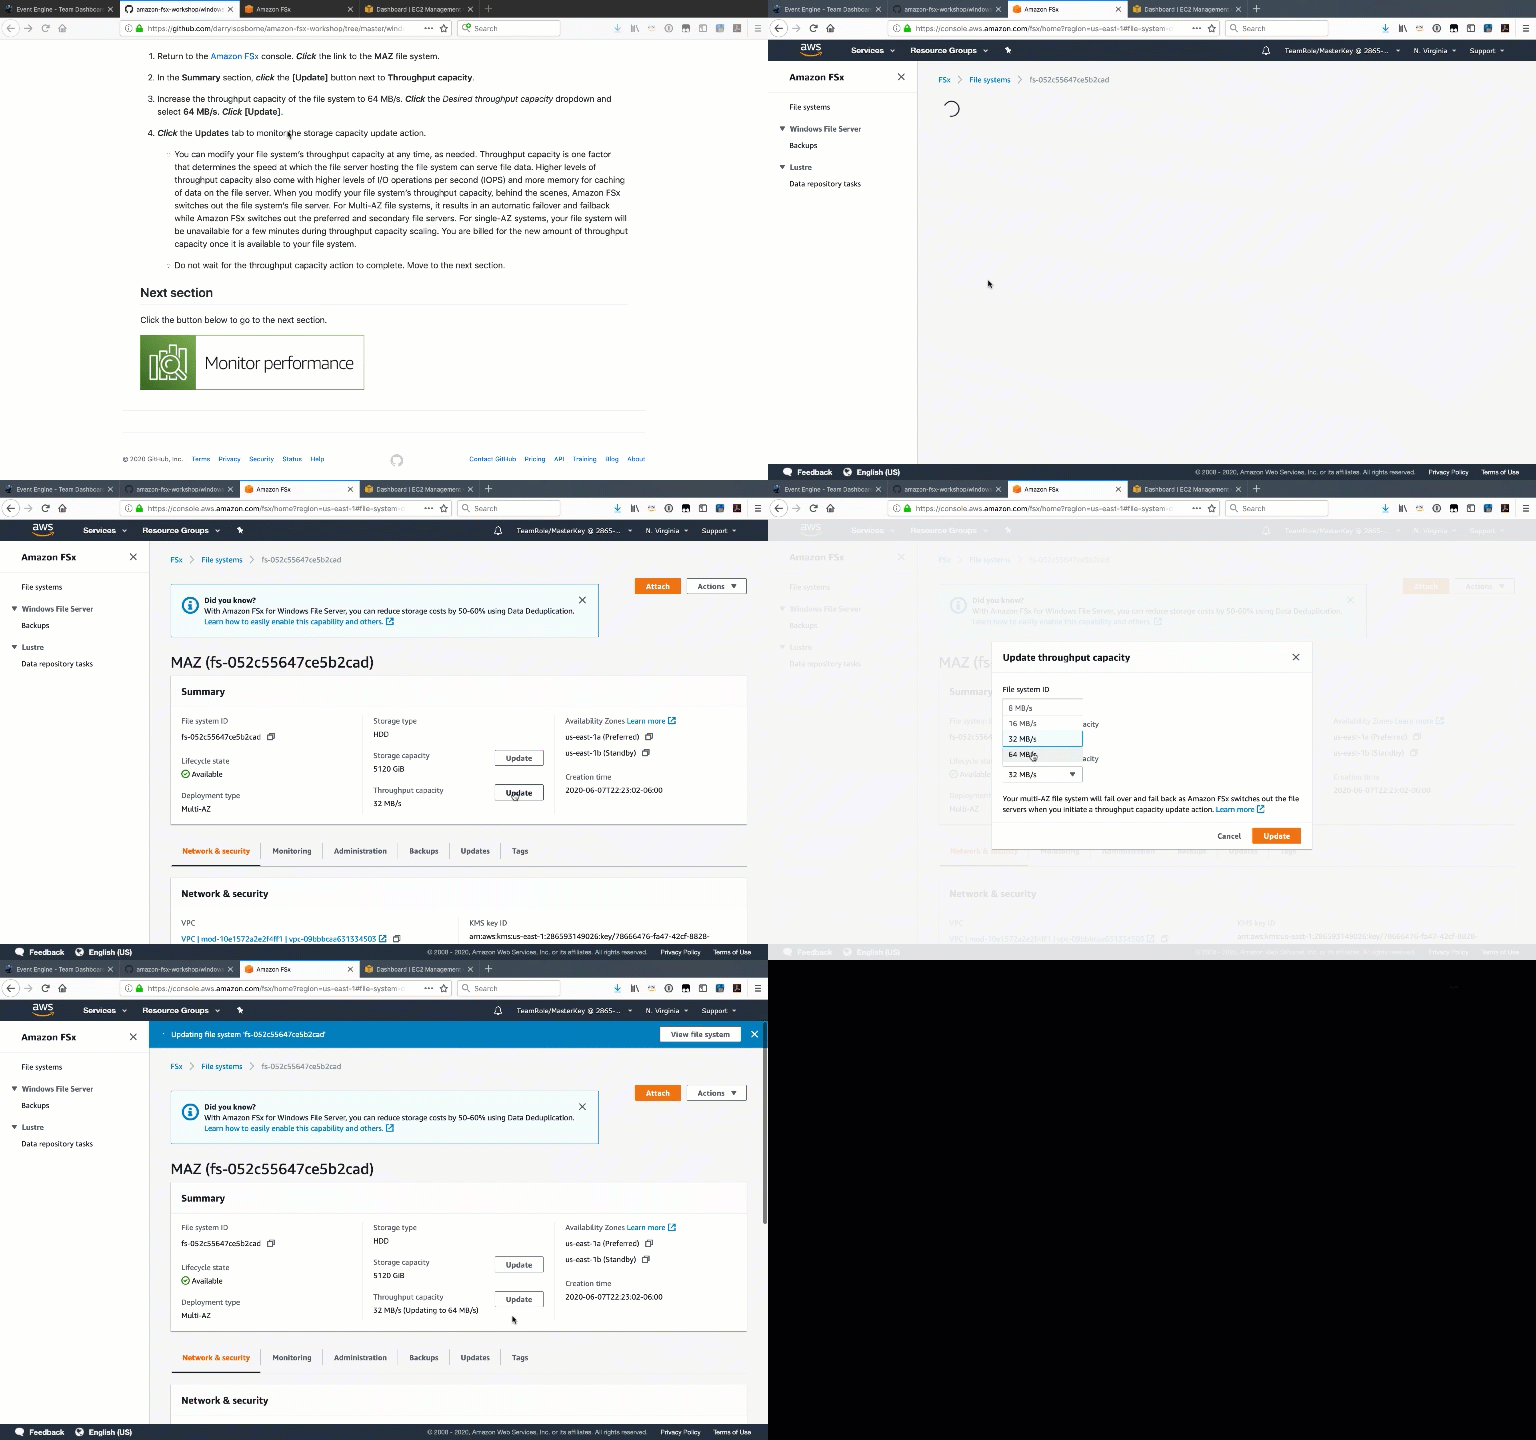
Return to the Amazon FSx console. Click the link to the MAZ file system.
-
In the Summary section, click the [Update] button next to Throughput capacity.
-
Increase the throughput capacity of the file system to 64 MB/s. Click the Desired throughput capacity dropdown and select 64 MB/s. Click [Update].
-
Click the Updates tab to monitor the storage capacity update action.
-
You can modify your file system’s throughput capacity at any time, as needed. Throughput capacity is one factor that determines the speed at which the file server hosting the file system can serve file data. Higher levels of throughput capacity also come with higher levels of I/O operations per second (IOPS) and more memory for caching of data on the file server. When you modify your file system’s throughput capacity, behind the scenes, Amazon FSx switches out the file system’s file server. For Multi-AZ file systems, it results in an automatic failover and failback while Amazon FSx switches out the preferred and secondary file servers. For single-AZ systems, your file system will be unavailable for a few minutes during throughput capacity scaling. You are billed for the new amount of throughput capacity once it is available to your file system.
-
You must wait for this update to complete before moving to the next section. This could take 20-25 minutes. During this time you can return to the Test Performance section and Run more DiskSpd read tests. Your DiskSpd test may experience an IO operation error if reading during one of the failovers. This is normal. If that happens, wait a few seconds and Run the test again. Continue monitoring the update status and wait until the update is complete before moving on to the next section.
-